
この記事は「flexboxの基礎(1)ヨコ方向」の続きになります。
こんにちは tanaka です。
今回は「flexboxのタテ方向」を説明します。
「タテ方向」は、ヨコとあまり変わりません。
違いは3つだけです。
1:flex-direction(並べる方向)
2:主軸
3:交差軸
それでは、
詳しく説明していきます。

「flexbox」タテ方向を作ってみよう
今回は、「flexboxのタテ方向」の説明をします。
やり方は、ほぼヨコ方向と変わりません。
さっそく「タテ方向」を1つ作ってみましょう。
<「flexbox」作ってみよう説明:タテ方向>
それでは「flexbox」を使って作ってみましょう。
作るのは「タテ方向」です。
<置き場所>

<並べるもの>

<完成>

html
    <div class="box02">
      <h2 class="sample01">1</h2>
      <h2 class="sample02">2</h2>
      <h2 class="sample03">3</h2>
    </div>
css
.box02 {
  width: 120px;
  height: 330px;
  background-color: rgb(86, 185, 169);

  display: flex;
  flex-direction: column;
  justify-content: space-around;
  align-items: center;
}

.sample01 {
  width: 80px;
  height: 80px;

  font-size: 74px;
  color: red;
  border: red solid 3px;
  background-color: white;
}

.sample02 {
  width: 80px;
  height: 80px;

  font-size: 74px;
  color: black;
  border: black solid 3px;
  background-color: white;
}

.sample03 {
  width: 80px;
  height: 80px;

  font-size: 74px;
  color: blue;
  border: blue solid 3px;
  background-color: white;
}
作る手順
「タテ方向」は、以下の手順で並べます。
1:「flexbox」開始を宣言
2:ヨコ方向かタテ方向どちらに並べるかを決める
3:主軸の調整
4:交差軸の調整
5:完成
これらのプロパティは全て「親要素」へ入れます。
それでは、
順番に見ていきましょう。
<1:「flexbox」開始を宣言>
まずは「flexbox」の開始を宣言します。
これは「タテ方向」「ヨコ方向」どちらでも変わりません。
html
    <div class="box02">
      <h2 class="sample01">1</h2>
      <h2 class="sample02">2</h2>
      <h2 class="sample03">3</h2>
    </div>
css(親要素)
.box02 {
  width: 120px;
  height: 330px;
  background-color: rgb(86, 185, 169);

  display: flex;
  flex-direction: column;
  justify-content: space-around;
  align-items: center;
}
<2:ヨコ方向かタテ方向どちらに並べるかを決める>
次に「ヨコ方向」「タテ方向」どちらに並べるかを決めます。
今回は「タテ方向」です。
flex-direction: column(タテ方向に並べる)
html
    <div class="box02">
      <h2 class="sample01">1</h2>
      <h2 class="sample02">2</h2>
      <h2 class="sample03">3</h2>
    </div>
css(親要素)
.box02 {
  width: 120px;
  height: 330px;
  background-color: rgb(86, 185, 169);

  display: flex;
  flex-direction: column;
  justify-content: space-around;
  align-items: center;
}
<3:主軸の調整>
次に「主軸の調整」します。
主軸は「並べる方向」でした。
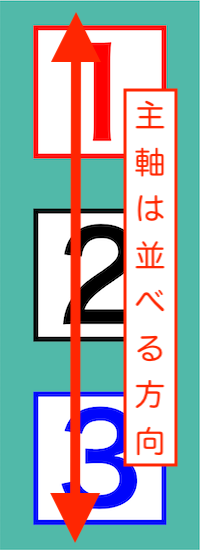
今回は、「タテ方向」に並べます。
なので「主軸もタテ方向」になります。
html
    <div class="box02">
      <h2 class="sample01">1</h2>
      <h2 class="sample02">2</h2>
      <h2 class="sample03">3</h2>
    </div>
css(親要素)
.box02 {
width: 120px;
height: 330px;
background-color: rgb(86, 185, 169);
display: flex;
flex-direction: column;
justify-content: space-around;
align-items: center;
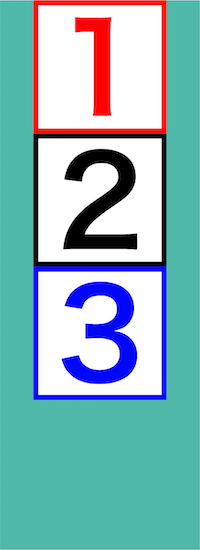
}<タテ主軸の調整「前づめ」>
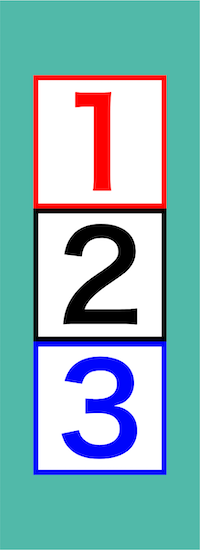
<タテ主軸の調整「中央」>
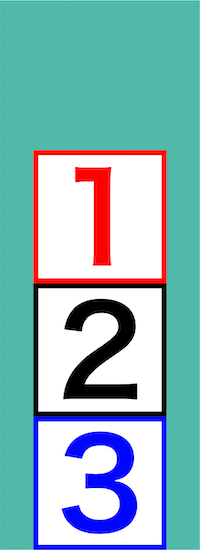
<タテ主軸の調整「後づめ」>
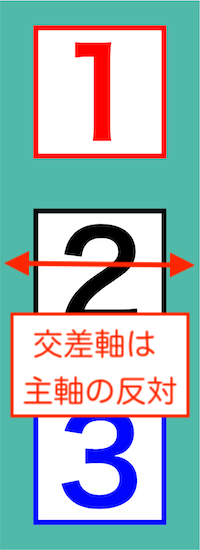
<4:交差軸の調整>
最後に「交差を調整」します。
交差軸とは「主軸と反対の軸」のことです。
交差軸を調整しましょう。
今回は「中央(center)」にします。
html
    <div class="box02">
      <h2 class="sample01">1</h2>
      <h2 class="sample02">2</h2>
      <h2 class="sample03">3</h2>
    </div>
css(親要素)
.box02 {
  width: 120px;
  height: 330px;
  background-color: rgb(86, 185, 169);

  display: flex;
  flex-direction: column;
  justify-content: space-around;
  align-items: center;
}
<タテ交差軸の調整「前づめ」>

<タテ交差軸の調整「中央」>

<タテ交差軸の調整「後づめ」>

<5:完成>
これで完成です。
<おさらい>
1:「flexbox」開始を宣言
2:ヨコ方向かタテ方向どちらに並べるかを決める
3:主軸の調整
4:交差軸の調整
5:完成
html
    <div class="box02">
      <h2 class="sample01">1</h2>
      <h2 class="sample02">2</h2>
      <h2 class="sample03">3</h2>
    </div>
css
.box02 {
  width: 120px;
  height: 330px;
  background-color: rgb(86, 185, 169);

  display: flex;
  flex-direction: column;
  justify-content: space-around;
  align-items: center;
}

.sample01 {
  width: 80px;
  height: 80px;

  font-size: 74px;
  color: red;
  border: red solid 3px;
  background-color: white;
}

.sample02 {
  width: 80px;
  height: 80px;

  font-size: 74px;
  color: black;
  border: black solid 3px;
  background-color: white;
}

.sample03 {
  width: 80px;
  height: 80px;

  font-size: 74px;
  color: blue;
  border: blue solid 3px;
  background-color: white;
}
「flexbox」実際にやってみよう
「flexbox」タテ方向を見てきました。
どうでしたか?
「flexbox」は見えてきましたか?
「flexbox」ができれば、
ほとんどのページは作成可能です。
ぜひ「flexbox」を使って何か1つ作ってみてください。
きっと楽しいですよ。
「flexbox」タテ方向まとめ
「flexbox」とは、
親要素へ命令を入れ、子要素を並べる機能です。
「flexbox」は、
以下の手順で子要素を並べていきます。
| 手順 | プロパティと値 |
| 1:開始宣言 | display: flex |
| 2:方向を決める | flex-direction: column |
| 3:主軸 | justify-content: space-around |
| 4:交差軸 | align-items: center |
主軸とは「並べる方向」のことです。
交差軸とは「主軸と反対の軸」のことです。
「flexbox」基礎編(3)折り返しへ続きます。
以上
よくわかる「flexbox」基礎編(2)タテ方向(html,css)
の話でした。
ありがとうございました。